Freehand Sketching Of Objects In 2D And 3D Assignment Help
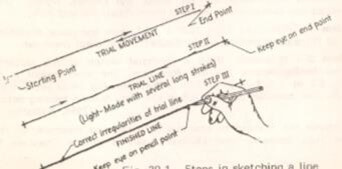
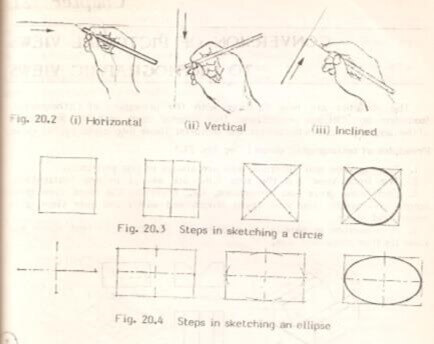
Sketching lines: Long lines may be drawn with the forearm motion while short lines drawn with wrist motion. Horizontal lines are drawn from left to right. Vertical lines are drawn from top to bottom with the finger movement in a series of overlapping strokes. Inclined lines running upward from left to right may be sketched upward with the same movement used for horizontal lines.

Sketching a circle: The circle which is the most difficult part of freehand sketching is drawn in stages. In this, first sketch lightly the enclosing square. Mark the mid-points of the sides and draw the centre lines. Now the centre and radius of the circle are obtained. Also draw the diagonals on which mark points for the diameter by eye judgement. Finally draw arcs tangential to the sides &draw a smooth circle passing through the 8 points so obtained.
Sketching an ellipse: First draw the centre lines and then a rectangle with sides equal to the major and minor axes. Draw the portion of the curves at the ends of the major and minor axes and thus complete the ellipse.
Sketching a sphere: The basic procedure for the sketching remains the same as that for a circle, except that this time a rough sketch of a cube is required. Then taking the centre points on all the 6 faces and interconnecting them a sphere is formed.
Freehand Sketching Of Objects In 2D And 3D Assignment Help By Online Tutoring and Guided Sessions from AssignmentHelp.Net

Sketching a cylinder: First draw the centre lines for two circles at and then a cuboid whose length is equal to the length of the cylinder required but in perspective. Draw the two circle and then connect corresponding vertices of the circles with straight lines.


