
Validates the user input and removes the tags from the input
|
1 |
|---|
Cross-Site Scripting (XSS) Attack Lab
|
|---|
Cross-site scripting (XSS) is a type of vulnerability commonly found in web applications. This vulnerability makes it possible for attackers to inject malicious code (e.g. JavaScript programs) into victim’s web browser. Using this malicious code, attackers can steal a victim’s credentials, such as session cookies. The access control policies (i.e., the same origin policy) employed by browsers to protect those credentials can be bypassed by exploiting XSS vulnerabilities.
|
|---|
| UserName | ||
|---|---|---|
|
|
The above URL is is only accessible from inside of the virtual machine, because we have modified the /etc/hosts file to map the domain name of each URL to the virtual machine’s local IP address (127.0.0.1). You may map any domain name to a particular IP address using /etc/hosts. For example, you can map http://www.example.com to the local IP address by appending the following entry to /etc/hosts:
127.0.0.1 www.example.com
| <VirtualHost *> ServerName http://www.example1.com |
|---|
| <VirtualHost *> ServerName http://www.example2.com |
|---|
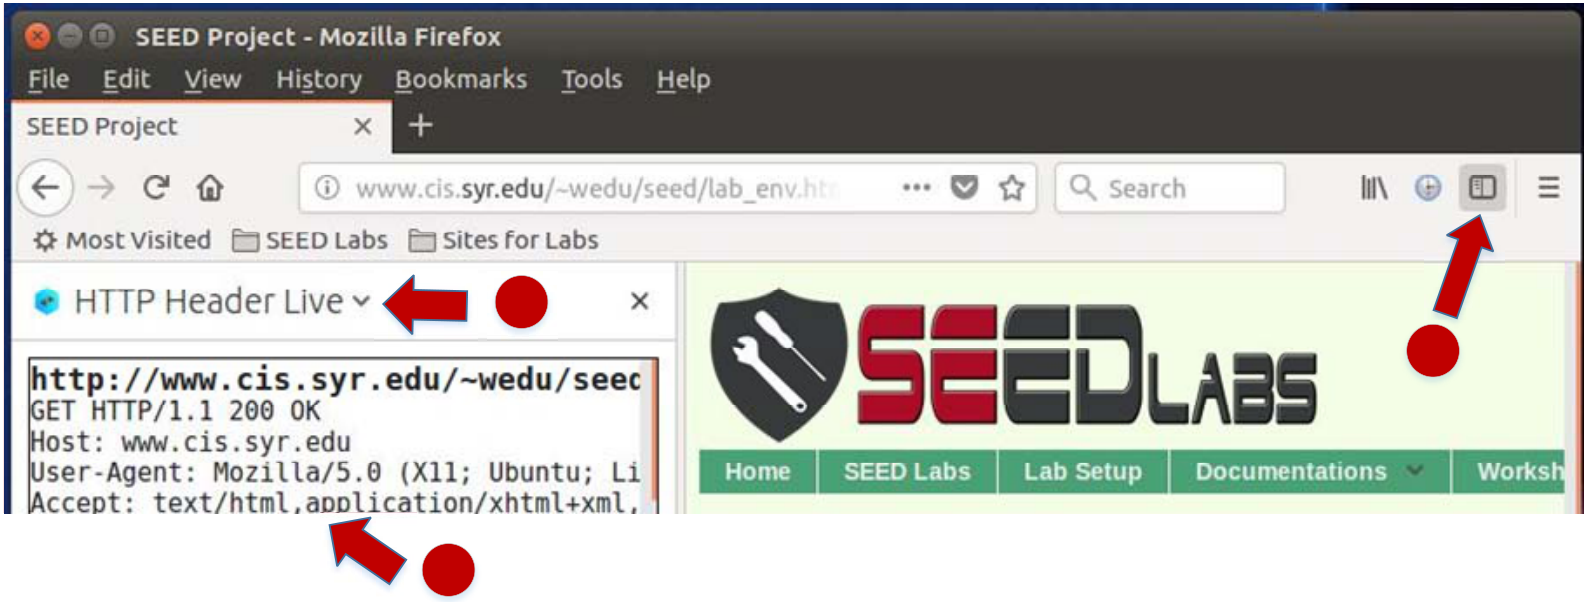
3.1 Preparation: Getting Familiar with the "HTTP Header Live" tool
In this lab, we need to construct HTTP requests. To figure out what an acceptable HTTP request in Elgg looks like, we need to be able to capture and analyze HTTP requests. We can use a Firefox add-on called "HTTP Header Live" for this purpose. Before you start working on this lab, you should get familiar with this tool. Instructions on how to use this tool is given in the Guideline section (§ 4.1).
In this case, the JavaScript code is short enough to be typed into the short description field. If you want to run a long JavaScript, but you are limited by the number of characters you can type in the form, you can store the JavaScript program in a standalone file, save it with the .js extension, and then refer to it using the src attribute in the <script> tag. See the following example:
|
|---|
The objective of this task is to embed a JavaScript program in your Elgg profile, such that when another user views your profile, the user’s cookies will be displayed in the alert window. This can be done by adding some additional code to the JavaScript program in the previous task:
| 4 | ||
|---|---|---|
We can do this by having the malicious JavaScript insert an <img> tag with its src attribute set to the attacker’s machine. When the JavaScript inserts the img tag, the browser tries to load the image from the URL in the src field; this results in an HTTP GET request sent to the attacker’s machine. The JavaScript given below sends the cookies to the port 5555 of the attacker’s machine (with IP address 10.1.2.5), where the attacker has a TCP server listening to the same port.
The task can also be done with only one VM instead of two. For one VM, you should replace the attacker’s IP address in the above script with 127.0.0.1. Start a new terminal and then type the nc command above.
3.5 Task 4: Becoming the Victim’s Friend
| <script type="text/javascript"> |
|---|
|
|
|---|
|
|
Ajax.setRequestHeader("Content-Type","application/x-www-form-urlencoded");
Ajax.send();
• Question 1: Explain the purpose of Lines and , why are they are needed?
• Question 2: If the Elgg application only provide the Editor mode for the "About Me" field, i.e., you cannot switch to the Text mode, can you still launch a successful attack?
| window.onload = function(){ |
|---|
|
|---|
| 6 | |||
|---|---|---|---|
| var samyGuid=...; | | ||
{
//Create and send Ajax request to modify profile
Ajax.setRequestHeader("Content-Type",
"application/x-www-form-urlencoded");
Similar to Task 4, the above code should be placed in the "About Me" field of Samy’s profile page, and the Text mode should enabled before entering the above JavaScript code.
Questions. Please answer the following questions:
Link Approach: If the worm is included using the src attribute in the <script> tag, writing self-propagating worms is much easier. We have discussed the src attribute in Task 1, and an example is given below. The worm can simply copy the following <script> tag to the victim’s profile, essentially infecting the profile with the same worm.
|
|
|---|---|
| DOM Approach: | |
| propagate the worm to another profile, the worm code can use DOM APIs to retrieve a copy of itself from | |
|
|
|---|
When data are sent in HTTP POST requests with the Content-Type set to application/x-www-form-urlencoded, which is the type used in our code, the data should also be encoded. The encoding scheme is called URL encoding, which replaces non-alphanumeric characters in the data with %HH, a per-centage sign and two hexadecimal digits representing the ASCII code of the character. The encodeURICom ponent() function in line is used to URL-encode a string.
Note: In this lab, you can try both Link and DOM approaches, but the DOM approach is required, because it is more challenging and it does not rely on external JavaScript code.
3.9 Task 7: Defeating XSS Attacks Using CSP
The fundamental problem of the XSS vulnerability is that HTML allows JavaScript code to be mixed with data. Therefore, to fix this fundamental problem, we need to separate code from data. There are two ways to include JavaScript code inside an HTML page, one is the inline approach, and the other is the link approach.
Run a web server. CSP is set by the web server. Let us use a web page to see CSP in action. Although we can use the Apache server (already installed in our VM) to host the web page, we decide to write a simple HTTP server to do this job. The following Python program runs an HTTP server that listens to port 8000. Upon receiving a request, it loads a static file and return it to the client. In the response, the server adds a CSP header, setting the policy on the JavaScript code inside the page.
Listing 1: A simple HTTP server http server.py
| #!/usr/bin/env python3 |
|---|
|
|---|
self.end_headers()
self.wfile.write(f.read())
The web page for the experiment. To see how the CSP policies work, we wrote the following HTML page, which contains six areas, area1 to area6. Initially, each area displays "Failed". The page also
<script type="text/javascript" nonce="2rB3333"> document.getElementById(’area2’).innerHTML = "OK"; </script>
<script type="text/javascript">
document.getElementById(’area3’).innerHTML = "OK"; </script>
| 127.0.0.1 127.0.0.1 127.0.0.1 | |
|---|---|
| Lab tasks. |
|
1. Point your browser to the following URLs. Describe and explain your observation.


|
10 | |
|---|---|---|
| 4.1 | ||
2
1
|
|---|
| 11 |
|---|
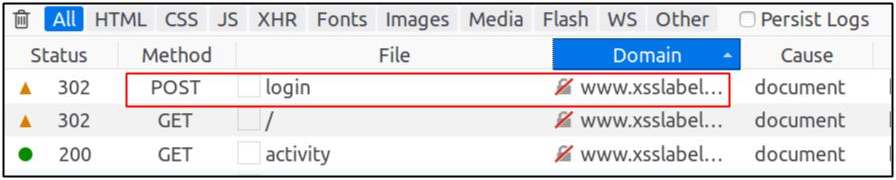
Figure 2: HTTP Request in Web Developer Network Tool
4.3 JavaScript Debugging
We may also need to debug our JavaScript code. Firefox’s Developer Tool can also help debug JavaScript code. It can point us to the precise places where errors occur. The following instruction shows how to enable this debugging tool:
5 Submission
You need to submit a detailed lab report, with screenshots, to describe what you have done and what you have observed. You also need to provide explanation to the observations that are interesting or surprising.
(b) HTTP Request Parameters
Figure 4: HTTP Headers and Parameters

Figure 6: Debugging JavaScript Code (2)


