

The recommended tape lufkin executive diameter tape
LABORATORY THREE
ANTHROPOMETRY
2. Be able to use the ISAK Level 1 profile assessment for the analysis of an
individual’s body composition.
electronic digital scales
Lufkin executive diameter tape (W606PM)
COVID Safety Stage 2 – hand washing / sanitise and gloves for each person.
Repeat for each different person you have contact with. Minimise time spent
4. Check your skinfold technique for competency assessment with your tutor
5. Use the ISAK Level 1 profile assessment template to create a report
The description of the anthropometric sites and measurement procedures in this lab manual are reproduced from Norton et al. (1996). For further information regarding measurements not included in this manual, Norton et al. (1996) provides additional technical advice.
For reasons of timeliness, practicality, and cost-effectiveness, the routine monitoring of body composition among athletic populations is most often undertaken using anthropometric characteristics such as body mass plus subcutaneous skinfold thicknesses and girths at specific anatomical landmarks. Unlike other techniques requiring expensive, laboratory-based equipment, surface anthropometry only requires relatively inexpensive equipment that is easily portable. However, highly skilled technicians are required if reliable data are to be collected. Technicians need to be meticulous in terms of both accurate site location and measurement technique. Measurements just 1 to 2 cm away from a defined site can produce significant differences in results (Hume and Marfell-Jones 2008). Furthermore, if repeat measurements are to be taken over time, it is important that the same technician collect the data (Hume and Marfell-Jones 2008).
• A constant fat fraction in adipose tissue
• Fixed proportion of visceral to subcutaneous fat

METHODS
Where possible a recorder or ‘scribe’ should be used to enter data. Ideally the recorder will be knowledgeable in the skill of measurement and so will be able to assist the measurer.
The measurer should use single numbers only, for example 29.16 is described as ‘two, nine, point one, six’. The recorder repeats the value as it is being recorded to enable the measurer to do an immediate check. It must be remembered that the measurer and the recorder work as a team and it is the responsibility of the recorder to help the measurer wherever necessary.
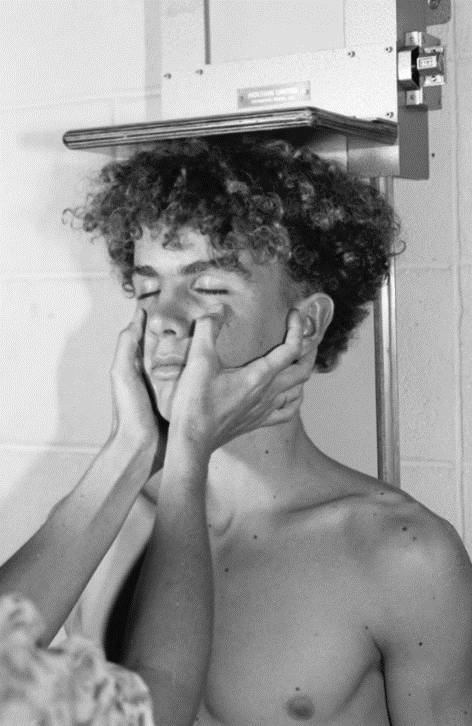
There are three general techniques for measuring stature, namely free standing, stretch and recumbent. The latter may be used for infants or adults unable to stand and will not be considered here. The other two methods will give slightly different values, because stretch height removes the minor effect of daily gravitational compression. Height exhibits diurnal variation, generally subjects are taller in the morning and shorter in the evening. Repeated measures should be taken as near as possible to the same time of day as the original measurement.
Method
The stretch stature method requires the subject to stand with the feet
together and the heels, buttocks and upper part of the back touching the
scale. The head when placed in the Frankfort plane need not be touching
the scale.
method
Body Mass
Equipment
A calibrated electronic scale or a beam balance accurate to the nearest
0.1 kg should be used for body mass measurement. In the field situation
a spring balance may have to be used with accuracy to the nearest 0.5
kg.
The landmark is identified with the left hand, usually with the thumb. The site is released to remove any distortion of the skin, then is relocated and marked with the thumb nail. Using a fine-tipped felt pen the site is marked in a straight line directly over the landmark. The pen mark is then checked to ensure that there has been no displacement of skin relative to the underlying bone.
Identify anatomical landmarks using the following descriptions prior to taking any measurements. All sites should be marked and measured on the right side of the body.
|
||
|---|---|---|
| corner of the | ||
the acromion to confirm the location
of the border. The landmark is a
point on the most lateral and
superior part of the border.
radius is marked.
7
| Definition: | The midpoint of the | |
|---|---|---|
|
||
8
|
 |
|---|
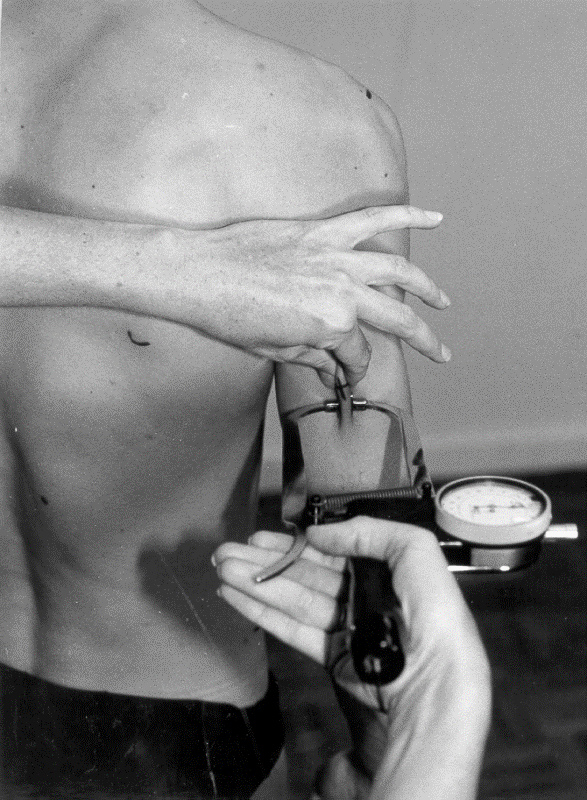
Figure 8: Bicep skinfold site
|
||
|---|---|---|
| The person | ||
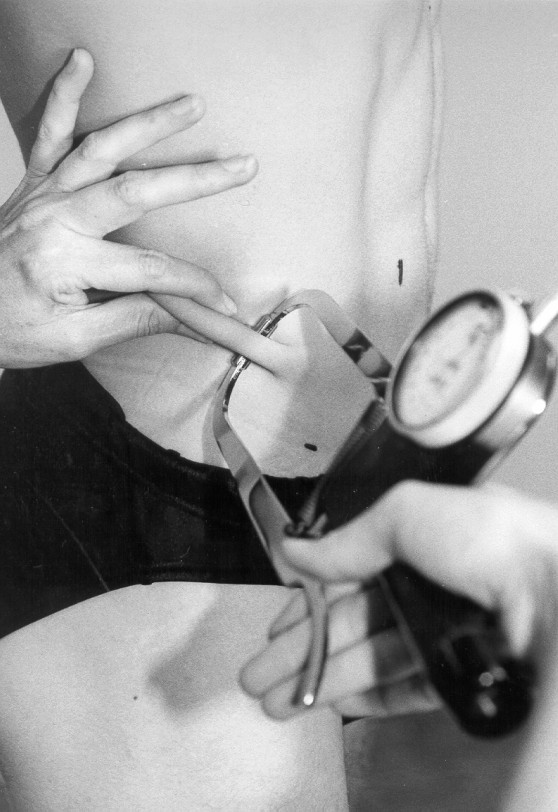
Location: Place your thumb on the ilio-cristale landmark and raise the skinfold between the thumb and index finger of the left hand. Once the skinfold has been raised, mark the site with a cross (+). The fold runs anteriorly and downward in line with the natural fold of the skin.
11
with the feet together and the weight evenly distributed.
Supraspinale skinfold site
Subject position: The athlete assumes a relaxed standing position with the arms hanging by the sides. The right arm may be abducted after the anterior axillary border has been identified.
Location: Run a tape from the anterior axillary border to the marked iliospinale and draw a short line along the side roughly at the level of the illio-axilla. Then run the tape horizontally around from the marked ilio-axilla to intersect the first line.
site
Medial calf skinfold site
For mark up, the person must be |
||
|---|---|---|
|
||
standing with weight evenly
distributed)
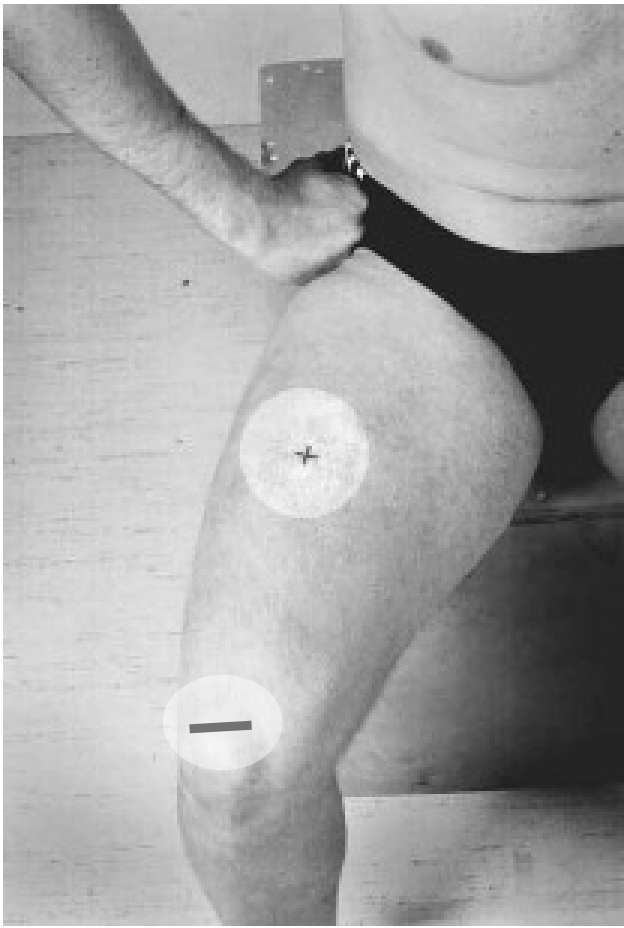
Figure 14: Anterior patella and
front thigh skinfold site
Front thigh skinfold site
Equipment
The Harpenden caliper has been used as the criterion instrument by ISAK.
These calipers have a compression of 10 g.mm-2, are calibrated to 40 mm
in 0.2 mm divisions and may be accurately interpolated to the nearest
0.1 mm. The instructions in this chapter are for the Harpenden caliper.
The application of skinfold data to any regression equation is only
appropriate if the same calipers are used as those with which the
regression equation was derived.
An anthropometric tape is required to locate a number of skinfold sites. The recommended tape is a Lufkin Executive Diameter tape (W606PM). If any other type of tape is to be used it should be non-extensible, flexible, no wider than 7 mm and have a stub (blank area) of at least 3 cm before the zero line.
The calipers are applied to the fold so that there is 1 cm between the near edge of the fingers and the nearest edge of the caliper face. The caliper needs to be placed high enough not to be in contact with the non-fold surface which might grip and exaggerate the size of the fold but not too close to the top of the fold from which it might slip off. The calipers are always applied at right angles to the fold.
The reading of the dial to 0.1 mm is made two seconds after the complete release of the caliper trigger. In the case of large skinfolds the needle may still be moving at this point. The measurement is nevertheless recorded at this time.
Figure 15: Triceps skinfold
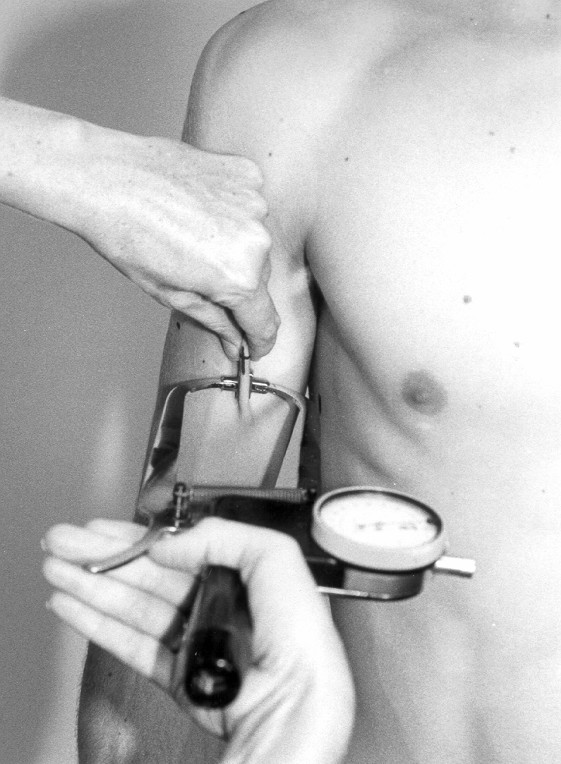
Biceps
This skinfold is raised with the left thumb and index finger on the
marked mid-acromiale-radiale line so that the fold runs vertically,
parallel to the axis of the upper arm (Figure 17).
Abdominal
| Figure | 19: |
|---|
18
This is a vertical fold raised 5 cm from the right-hand side of the
Front Thigh
The measurer stands facing the right side of the subject on the lateral
side of the thigh. The subject’s knee is bent at right angles by having
the subject place the right foot on a box or by being seated. If the
fold is difficult to raise, the subject may be asked to extend the knee
joint slightly by moving the foot forward to relieve the tension of the
skin. If there is still difficulty, the subject may assist by lifting
the underside of the thigh to relieve the tension of the skin. The
calipers are then located in between the recorder’s hands, 1 cm from the
recorder’s thumb and forefinger of the right hand (Figure 21).
Medial Calf
The subject is either seated or standing with their foot on a box, the
knee is flexed at 90º and the calf is relaxed. The vertical fold is
raised on the medial aspect of the calf at a level where it has maximal
The maximal circumference.
Figure 22: Medial calf
20


