Language:EN
Pages: 2
Rating : ⭐⭐⭐⭐⭐
Price: $10.99
Page 1 Preview
simply click and hold down the mouse button

Simply click and hold down the mouse button

568

Book VII �Chapter 3: Distorting with the Liquify Command

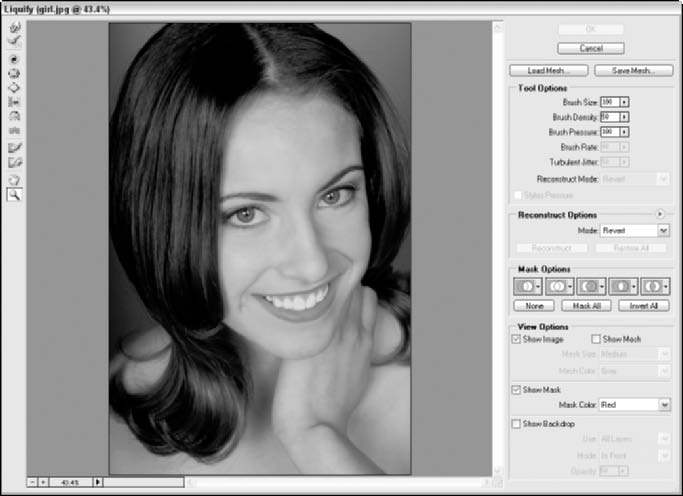
The first group of tools is the group used to paint distortions on your image. Shown in this list with their keyboard shortcuts in parentheses, the painting tools are (from top to bottom; see Figure 3-1):

When compared to a tool like the Smudge tool, which tends to destroy detail, the Warp tool

can preserve detail within distortions.

Exploring the Liquify Window 569

Pucker (S): This tool is the equivalent of the Pinch filter, squishing pixels toward the

center of the area covered by the brush as you hold down the mouse button or drag. To

reverse the pucker direction, which essentially applies a bloat, press the Alt (Option on

of the brush area as you hold down the mouse button or drag the mouse. To reverse the

Push Left (O): Formerly known as the Shift Pixels tool, this odd tool moves pixels to the

left when you drag the tool straight up. Drag down to move pixels to the right. Drag

of your pixels at a 90-degree angle to the motion of the brush. Hold down the Alt key

(Option key on the Mac) to force the reflection in the direction opposite the motion of

waves.

You can see the effects of each of these tools in Figure 3-2.

Freeze Mask (F): Use this tool to protect areas from changes. It paints the frozen area

with a red overlay, just as the Quick Mask mode does (which, in a sense, the Freeze Mask tool is, as you can find out later in this chapter in the section, “Mastering Freezing and Thawing”).

You are viewing 1/3rd of the document.Purchase the document to get full access instantly

Immediately available after payment
Both online and downloadable
No strings attached
How It Works
Login account
Login Your Account
Place in cart
Add to Cart
send in the money
Make payment
Document download
Download File
img

Uploaded by : Rodney Christian

PageId: DOCDC27FEE