
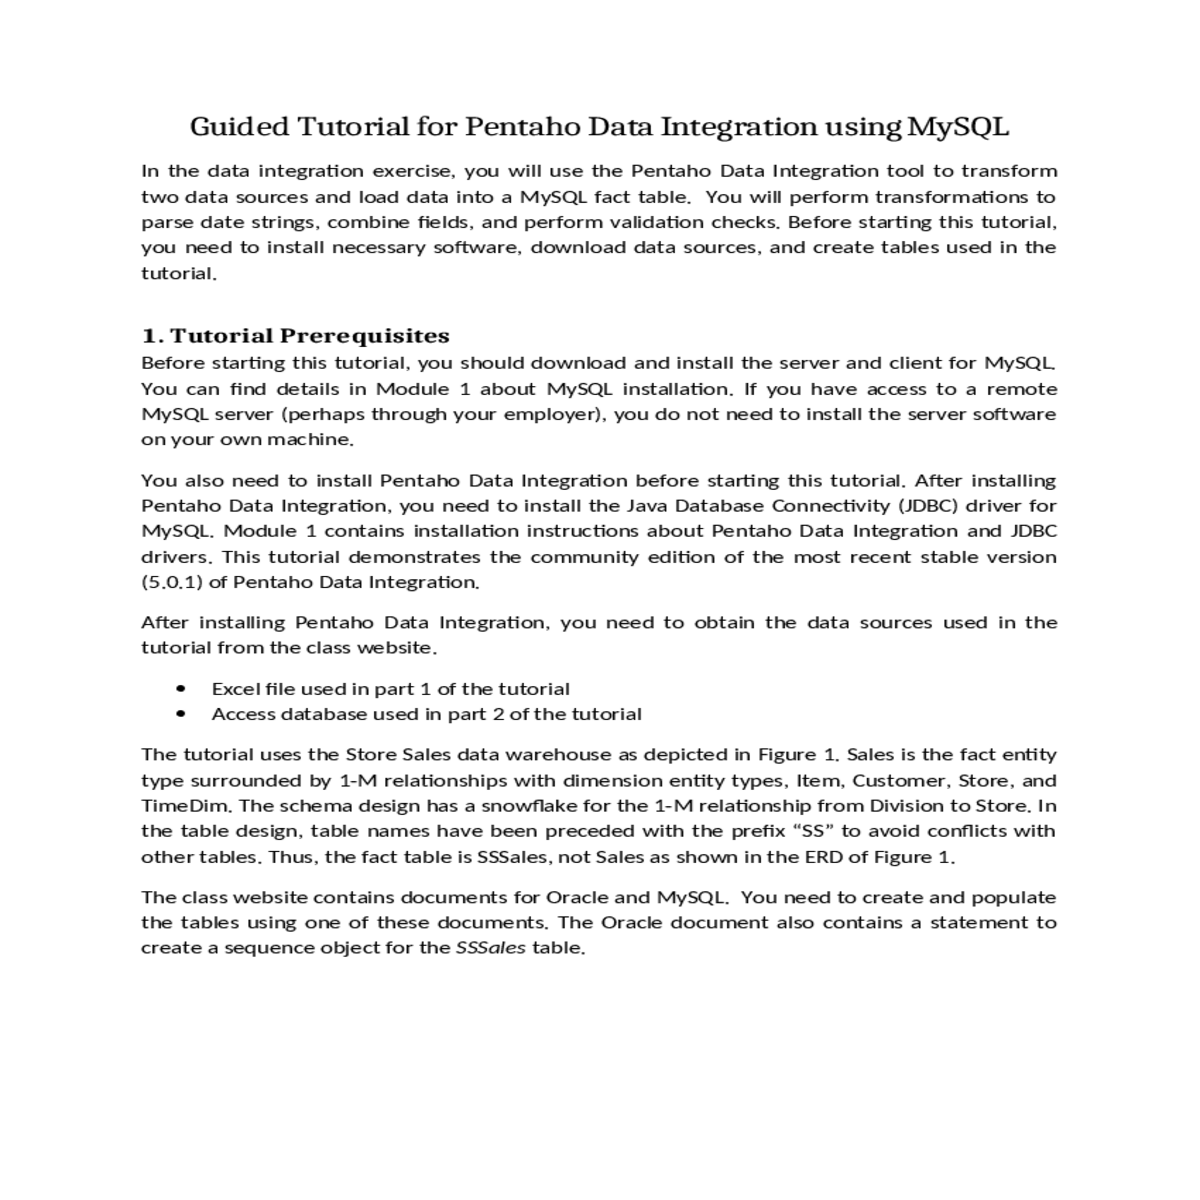
Guided Tutorial for Pentaho Data Integration using MySQL
In the data integration exercise, you will use the Pentaho Data Integration tool to transform two data sources and load data into a MySQL fact table. You will perform transformations to parse date strings, combine fields, and perform validation checks. Before starting this tutorial, you need to install necessary software, download data sources, and create tables used in the tutorial.
1. Tutorial Prerequisites
Before starting this tutorial, you should download and install the server and client for MySQL. You can find details in Module 1 about MySQL installation. If you have access to a remote MySQL server (perhaps through your employer), you do not need to install the server software on your own machine.
The tutorial uses the Store Sales data warehouse as depicted in Figure 1. Sales is the fact entity type surrounded by 1-M relationships with dimension entity types, Item, Customer, Store, and TimeDim. The schema design has a snowflake for the 1-M relationship from Division to Store. In the table design, table names have been preceded with the prefix “SS” to avoid conflicts with other tables. Thus, the fact table is SSSales, not Sales as shown in the ERD of Figure 1.
The class website contains documents for Oracle and MySQL. You need to create and populate the tables using one of these documents. The Oracle document also contains a statement to create a sequence object for the SSSales table.
2. Creating your First Transformation
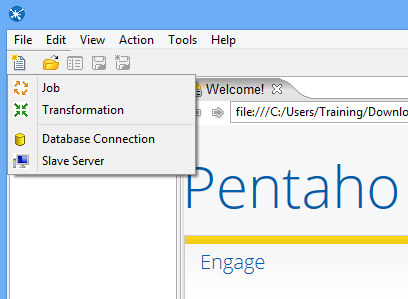
1. After starting Pentaho Data Integration, you will see the opening window (Figure 2) and the Spoon window (Figure 3).
2. Click (New) in the upper left corner of the Spoon window.
Figure 3: Spoon Opening Window
3. Load the first data source from Excel
Step 3 – Save the transformation following File → Save. You will see the empty transformation window in the Spoon (Figure 5).
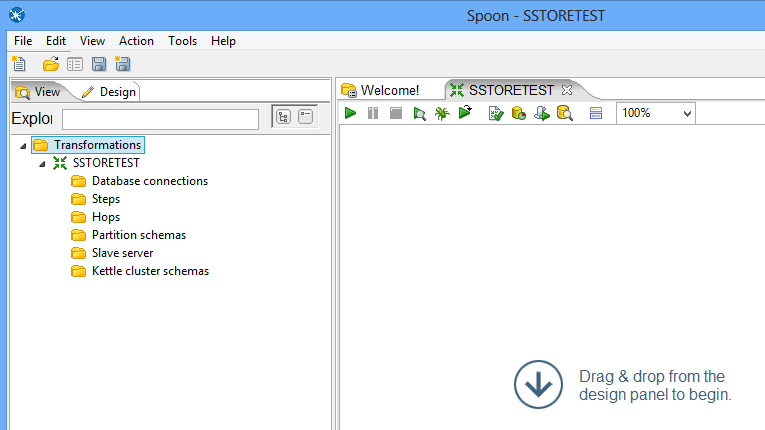
Figure 6: New Microsoft Excel Input Node
Select and drag a Microsoft Excel Input step into the canvas on the right.
In the tab named Files, click the button “Browse…” and locate the Excel file that you downloaded from the class website. Then, Click “Add” to add the file to the selected files area.
In the tab named Sheets, click the button “Get sheetname(s)…”. There will appear an Enter List (Figure 8) to choose sheets. Select Sheet 1, press “>” to move it into the right area. Click OK.
Figure 9: Fields Window for Microsoft Excel Input Property Editing
Click OK at the bottom of the window. The input icon will change to the SSExcel icon displayed in Figure 10.
Create a “hop” between the SSExcelSource (Excel file input) step and the Filter Rows step. Hops are used to describe the flow of data in your transformation. To create the hop, click the SSExcel Source (Excel file input) step, then press the <SHIFT> key down and draw a line to the Filter Rows step (Figure 11).
Double-click the Filter Rows step. The Filter Rows edit properties dialog box appears (Figure 13).
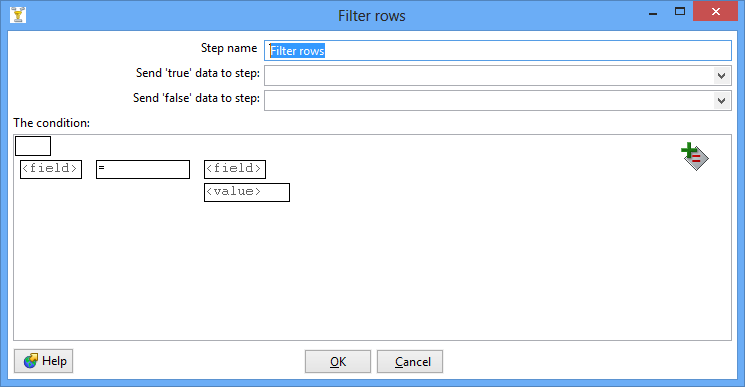
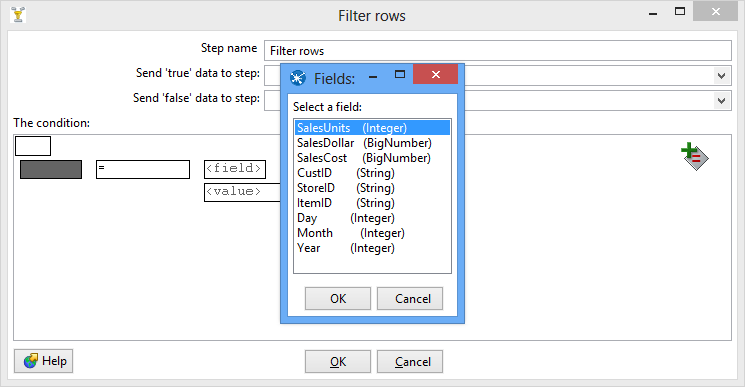
Figure 14: Condition Fields Selection Window
Click on the expression and add constraints for the next column similarly to what you did for “SalesUnits”
Click on UP. This will allow you to see both conditions joint by AND
Figure 16: Filter Conditions Window
Save your transformation.
Figure 17: Filter Results Selection List
Double-click the Sort Rows step to open its edit properties dialog box (Figure 18). Click “Get Fields” to obtain the fields. Delete other fields except the Day, Month and Year fields. Then click Ok.
4. Using a Database Connection to Lookup Columns from MySQL tables
Connections that are available for use with a transformation or job are listed under Database Connection node in the explorer View in Spoon.
There are several ways to define a new database connection:
Step 1 – Access the SSTimeDim table from MySQL database.
Under the Design tab, expand the contents of the Input node.
Figure 19: Property Edit Window of Table Input Node
Click “New…” next to the connection field. You must create a connection to the database. The Database connection dialog box appears.
Connection Name: MySQL5.6DB
Connection Type: MySQL
User name: (This should be your user name)
Password: (This should be your password)
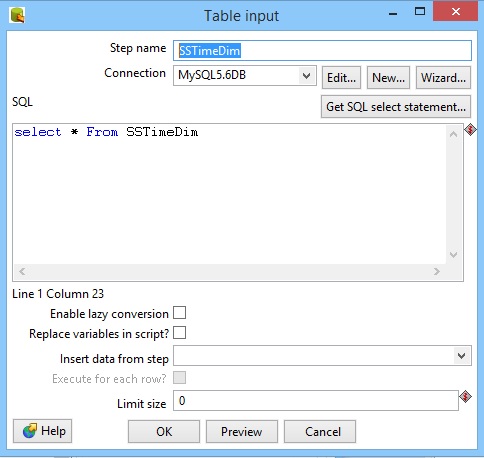
Figure 22: SQL Edit Section in Property Window of Table Input Node
Click and drag a Merge Join step into your transformation; create a hop between the Sort rows, Sort rows 2 and Merge Join steps (Figure 24).
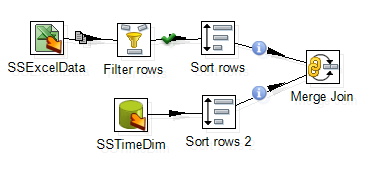
Now, we have finished inner join between Excel input and SSTimeDim table.
Step 2 – Inner join the SSItem, SSCustomer, and SSStore tables.
Create two sort rows components: Sort rows 3 and Sort rows 4, connecting Merge Join and SSItem respectively. See the field to be sorted as: ItemID and ITEMID respectively.
Drag and drop the Merge Join 2 into the design pane. Connect Sort rows 3 and Sort rows 4 to Merge Join 2. Set the field to be joined as Item ID and ITEMID.
Inner join the tables named SSCustomer and SSStore in your transformation using the same method described previously.
For the SSCustomer step, connect the CustID (from Excel file) and CUSTID (from Database) fields.
5. Insert data into the SSSales table
Under the Design tab, expand the contents of the Output node.
Click and drag an Insert/Update step into your transformation; create a hop between the Merge Join 4 and Insert/Update steps (Figure 28).
Figure 29: Property Edit Window of Insert/Update Node
Click the button “Get Updated fields” and then click on “Edit mapping” button to edit mapping. The mapping edit window is shown by Figure 30. Select the fields named SalesUnits, SalesDollar, SaleCost, CustID, StoreID, ItemID and TIMENO into the mappings field. Pentaho will automatically match the corresponding name in the Target field. Then click OK.
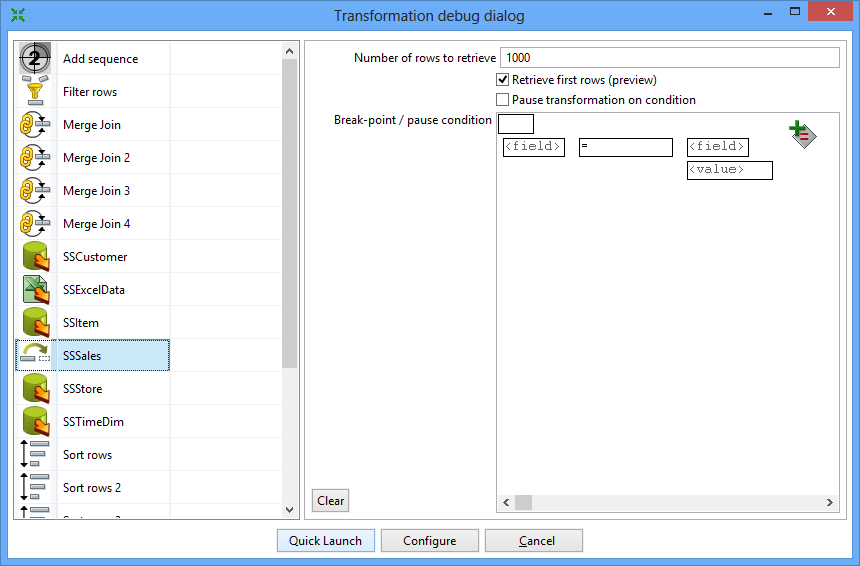
Select the SSSales step and run a preview by clicking on . In the transformation debug dialog click on Quick Launch (Figure 32).
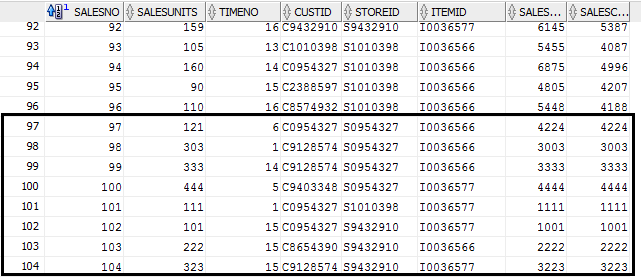
Connect to your MySQL account so you can verify the number of rows in the SSSales table. You should see 104 rows with 8 new rows added to the 96 rows in the sample data (Figure 34).
6. Load second data source from Access
Under the Design tab, expand the Input node. Figure 35 shows the Design table and input node.

Figure 36: Property Edit Window of Microsoft Access Input Node
Set name for the Access Input as Sales and specify the Excel data source path in the Files tab.
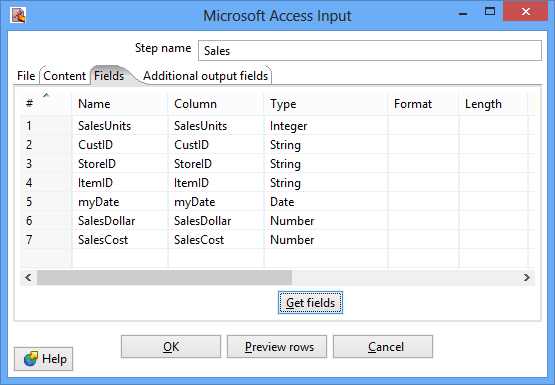
Figure 38: Fields Window for Microsoft Access Input Property Editing
Figure 40: Sales Node Icon
Create a hop between the Sales (Access file input) step and the Filter Rows step. Hops are used to describe the flow of data in your transformation. To create the hop, click the Sales (Access file input) step, then press the <SHIFT> key down and draw a line to the Filter Rows step.
Alternatively, you can draw hops by hovering over a step until the hover menu appears. Drag the hop painter icon from the source step to your target step.
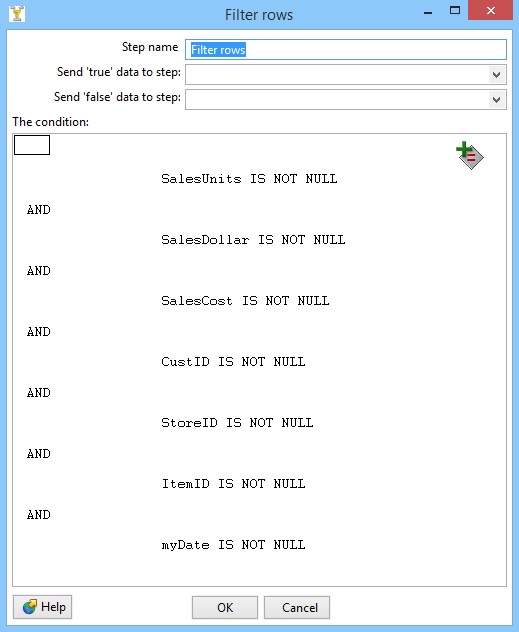
Figure 42: Filter Conditions Window
7. Separate SalesDay fields into Day, Month, Year fields
Create a “hop” between the Filter rows step and the Select values step (Figure 43). Select Result is TRUE in the filter results selection list

Figure 44: Meta-data Tab of Select Values Property Edit Window
Under the Design tab, expand the contents of the Transform node.
Double-click the Split fields step to open its edit properties dialog box (Figure 46).
Select myDate in the Field to split, type “-” as the Delimiter. Type in Year, Month and Day in the Column named New field, and set their Type as Number.
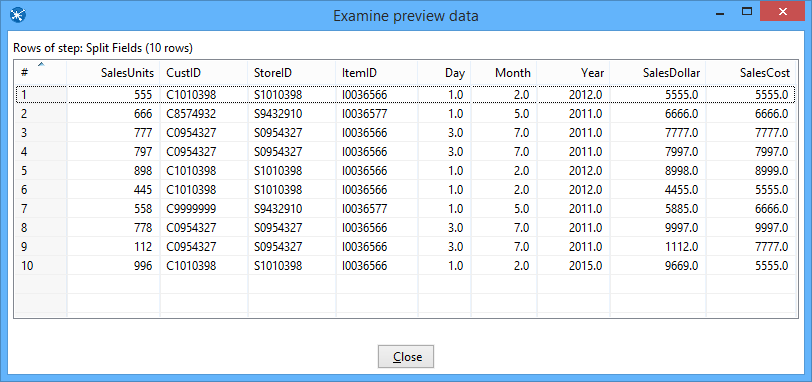
Figure 47: Examine Preview Data Window
8. Lookup Columns from the MySQL tables
Double-click the Table Input step to open its edit properties dialog box.
Rename your Table Input step to SSTimeDim.
Access: Native (JDBC)
Host Name: localhost
Click “Test”, to test the connection.
Type in “SELECT * FROM SSTimeDim” in the SQL section. You can click the Preview button to view the database. Click Ok, to exit the Database Connection dialog box.
Under the Design tab, expand the contents of the Join node.
Click and drag a Merge Join step into your transformation; create a hop between the Sort rows, Sort rows 2 and Merge Join steps.
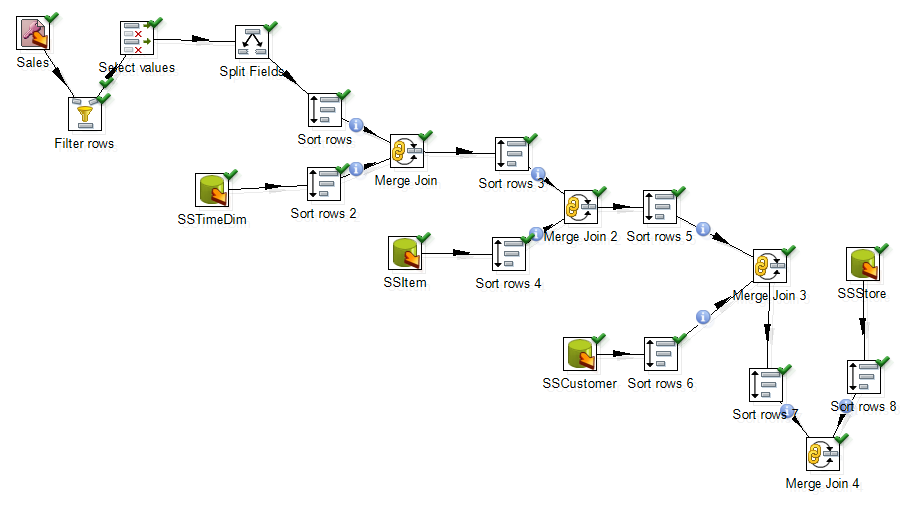
Figure 48: Global View of All Nodes and Connections after Step 1
Step 2 – Inner join SSItem, SSCustomer, and SSStore to Access table.
Figure 49 shows the global view of all nodes and connections after Step 2.
9. Insert data into the SSSales table
Click the button “Get Updated fields” and then click on “Edit mapping” button to edit mapping. The mapping edit window is shown by Figure 32. Select the fields named SalesUnits, SalesDollar, SaleCost, CustID, StoreID, ItemID and TIMENO into the mappings field. Pentaho will automatically match the corresponding name in the Target field. Then click OK.
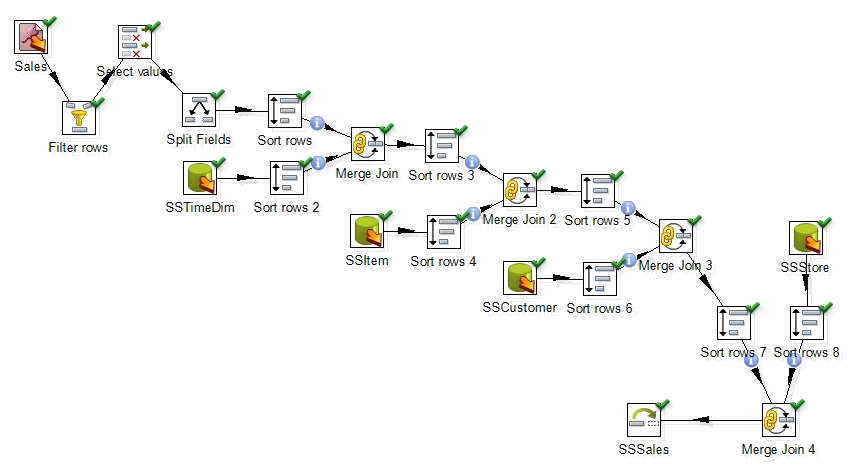
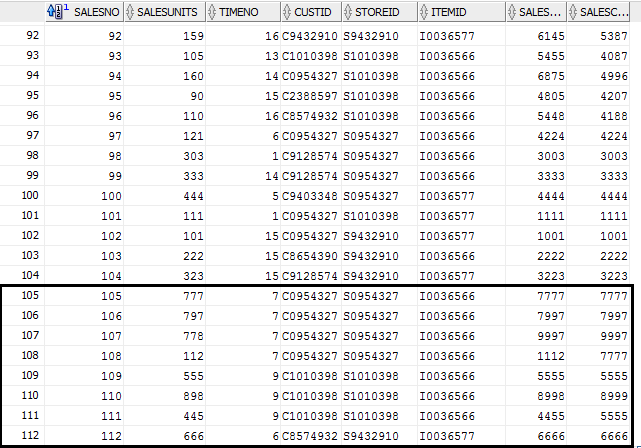
Figure 51: Inserted Data in Oracle Database


