

Can use the array post and encode json store the file
CS/IT 490 WD: Solo Assignment 3: JSON Blog Page 1 of 12
Assigned: 2013-09-20
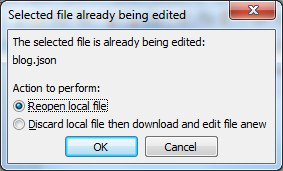
Tip: If FileZilla asks whether to reopen or discard a file...
• JSON File reading/writing
• Pulling data out of a form
CS/IT 490 WD: Solo Assignment 3: JSON Blog Page 2 of 12
Files
Model.php5 Not a webpage: Just a script file. Contains functionality for reading and writing the .json blog post.
Building the Blog
Within the blog, we are going to have two main sections: A list of posts that have already been posted, and a form where the user will enter the new post information.
CS/IT 490 WD: Solo Assignment 3: JSON Blog Page 3 of 12
|
Element Name |
|
|
|---|---|---|---|
|
Label for post-title
Label for post-year
|
post-month |
|---|
| post[content] | post-content | The actual blog post text |
|---|
CS/IT 490 WD: Solo Assignment 3: JSON Blog Page 4 of 12
Label for post-content
<? include_once( "model.php5" ); ?>
to the top of your file (after the DOCTYPE tag)
Then, create two comments in your page so we can keep things sectioned off:
<?
For the save functionality, first it will check to see if the new-post submit button has been hit. From there, it will push the new blog post on to the array of blog posts, and then encode the array to json and save to the blog.json file.
CS/IT 490 WD: Solo Assignment 3: JSON Blog Page 5 of 12
Now, upload the model.php5 to the server. Refresh the control-panel.php5 page, enter information into the various input fields, and then click Submit. You should see an array pop up after the refresh, which looks somewhat like this:
CS/IT 490 WD: Solo Assignment 3: JSON Blog Page 6 of 12
Now we know what is being posted to the server, but we need to actually do something with this information...
Saving our Blog Posts
The first time around, we won't have any blog.json file and no blog posts to pre-load; it's a blank slate. We can use the array in $_POST and encode it to JSON to store it in the file. However, we will have to come back to this later in order to account for pre-existing posts that we don't want to remove each time.
3. Write the json variable to the file (fwrite function)
4. Close the file (fclose function)
Sample blog.json file
CS/IT 490 WD: Solo Assignment 3: JSON Blog Page 7 of 12
if ( file_exists( $blogPath ) )
{
}
Now do the following:
Now, any existing blog posts should be stored in $blogPosts.
Add this to your model.php5 file after the if block:
Notice how the first element is [0]. Any additional blog posts will be [1], [2], etc. We can use a for-each loop to iterate through all posts on the blog page now!
The Blog Page
By including model.php5, the blog post loaded above (shown in the control panel) will automatically also be loaded on this blog page.
You can style this how you would like later, but for now, create a foreach loop within the <body> tags:
foreach( $blogPosts as $post )
{
}
?></body>
Saving, revisited.
Back in model.php5, we are going to modify the save section.
1. Remember that we have existing posts in the $blogPosts variable. We want to store the $_POST[“post”] data at the end of this array. Use the array_push function to push the new post onto the array of existing posts.
Our posts are in the form of an array. Now we can continue as before by converting the array to json (json_encode), opening a file to write to, and overwriting the existing blog.json.
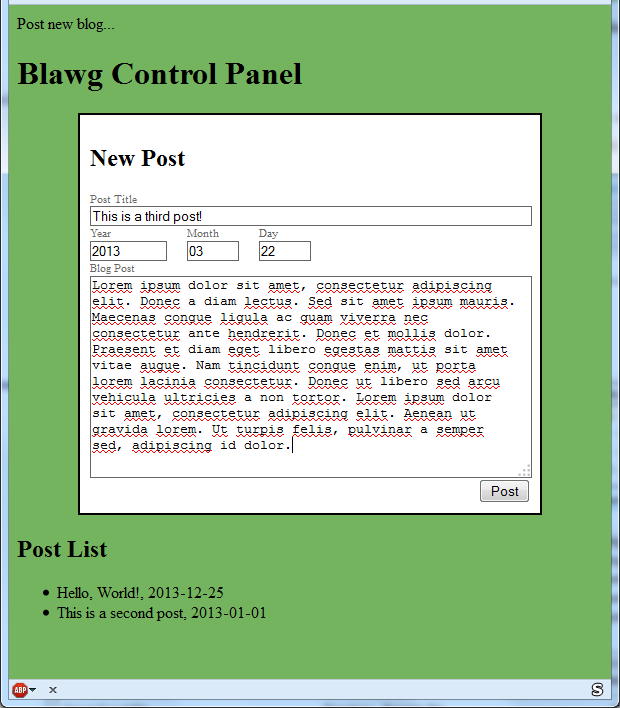
CS/IT 490 WD: Solo Assignment 3: JSON Blog Blog page with multiple posts:


